🕌 Eid Offer: 50% OFF PrestaShop Modules – Boost Sales Now!

Get the Deal
Days
Hrs
Min
Sec
Using the icon widget you can easily give the icon before the website, company, school and many other things.

Step 1:

Select the icon widget from the crazy elements(page builder) from the left side of the menu bar from your screen then drag and drop it in the selected area.

Step 2:

After dropping the selected area it will automatically take you to the content tab. In the content tab you will change the icon, view and give the alignment.

Step 3:

In the style tab you get the options to design your icon. Here you can change the icon Color,size, rotation and also can give the hover effect.

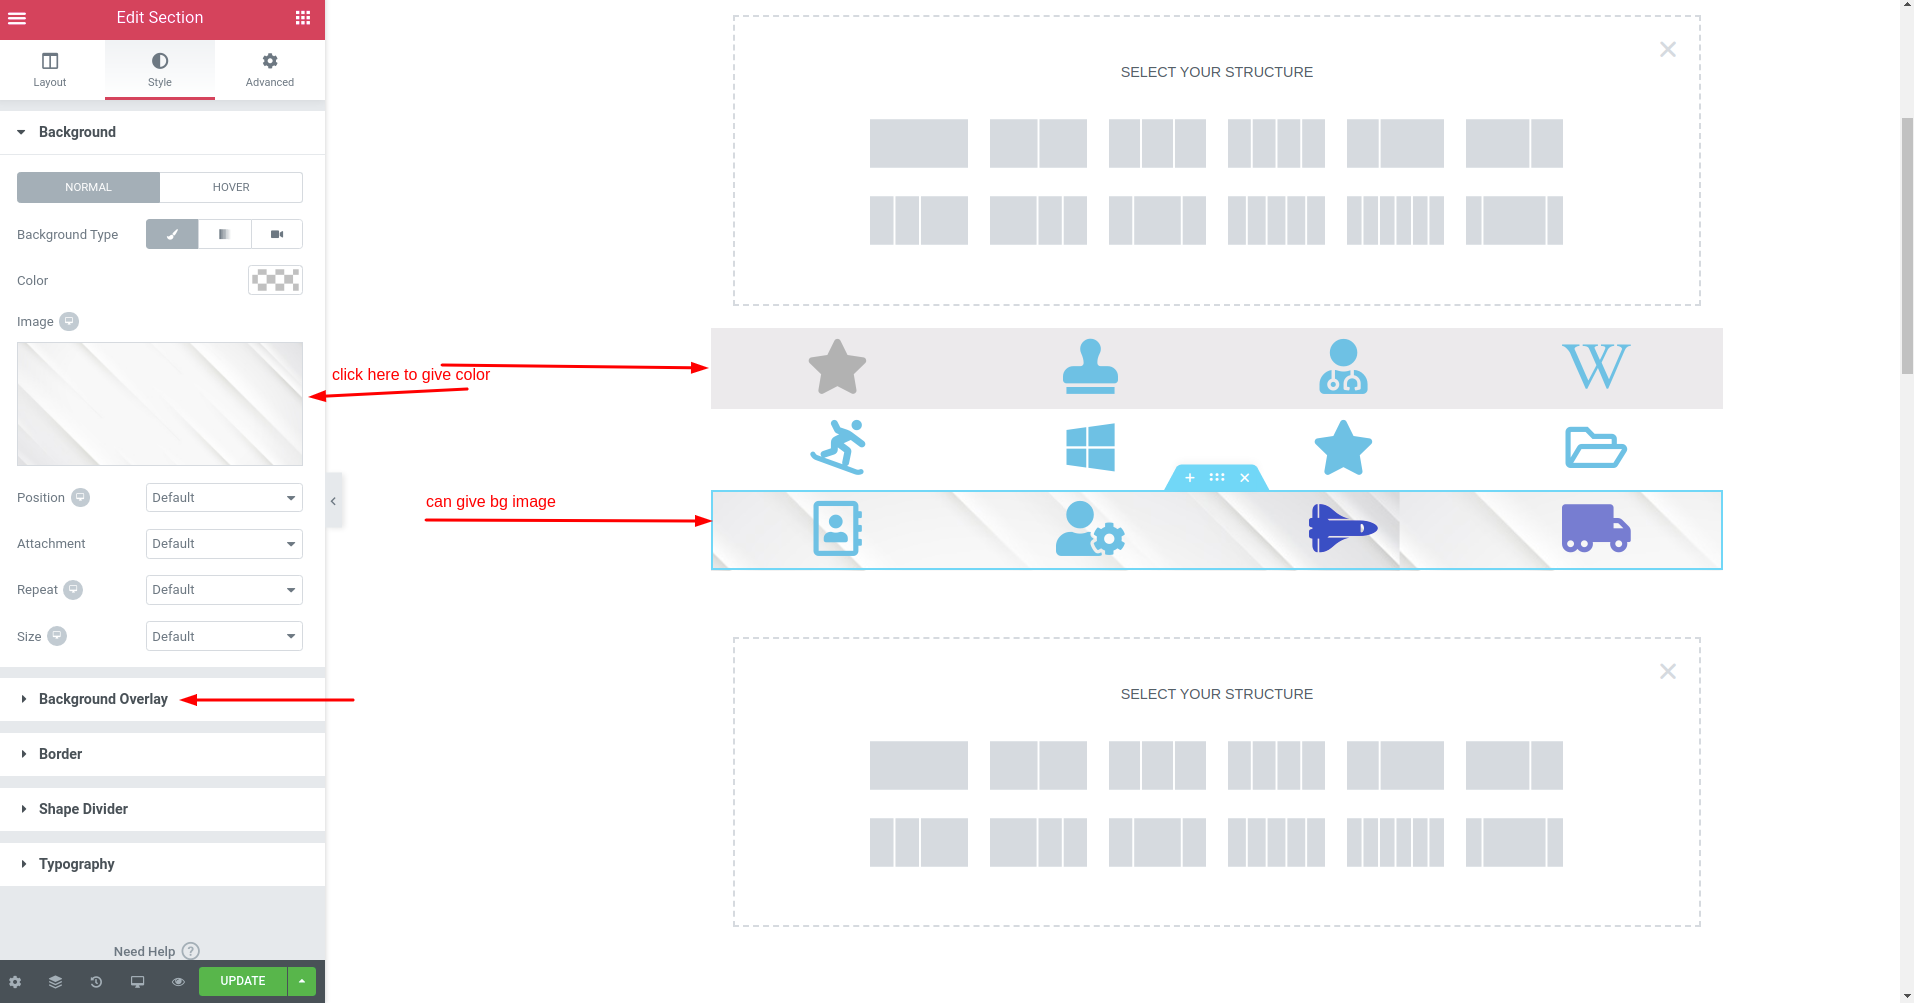
After left clicking on the background you will get two tabs Normal and Hoover. Here you can edit your icon list in two ways: classic or gradient. In both ways you can add background image, color, position, attachment  type(linear, radial) angle, location.

Shape divider will help you to give different types of shapes between background images.

In the Border tab you can edit the border of your icon list in two modes(Normal, Hover). In both modes you will get the different types of border options(Solid, Double, Dotted, Dashed, Groove) and you can give the border radius, box shadow(horizontal, vertical, blur, spread and the position(inline and outline)). You can also add custom positioning, responsive and custom css.

Video Tutorial

Eid al-Fitr Lifetime Deal

Days
Hours
Minutes
Seconds

Get 50% off All lifetime PestaShop Modules