It helps you to link the social media so that users can easily share and use it.
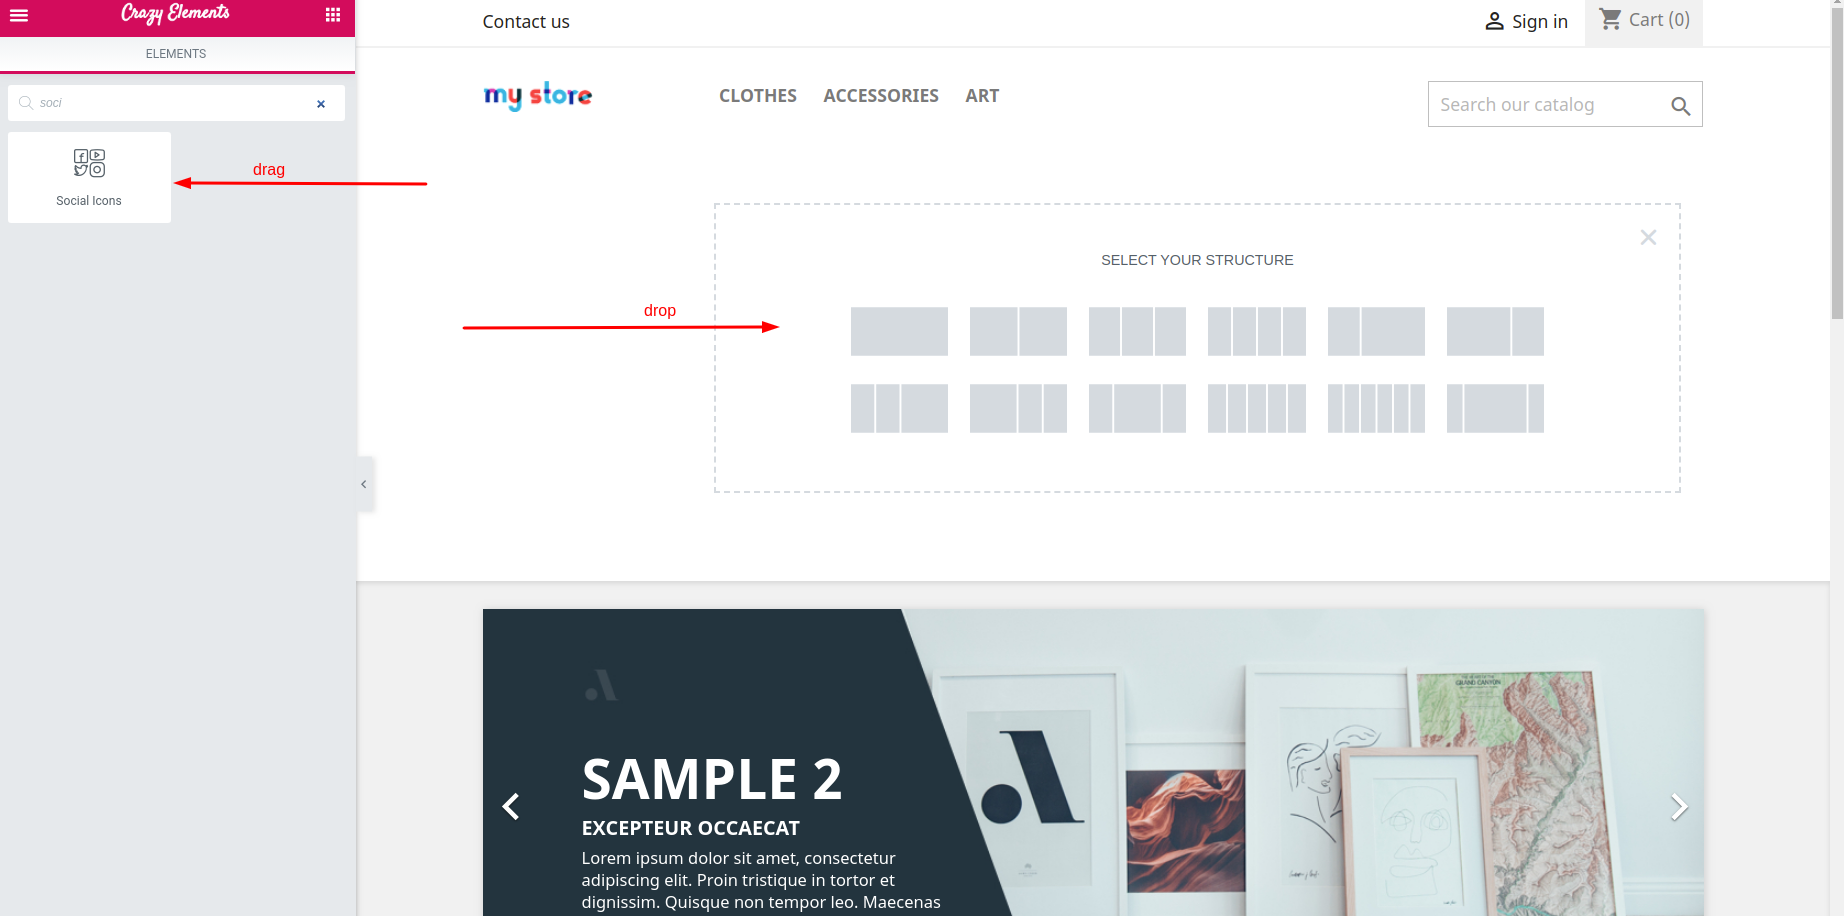
Step 1:
Select the social icons widget from the crazy elements(page builder) from the left side of the menu bar from your screen then drag and drop it in the selected area.
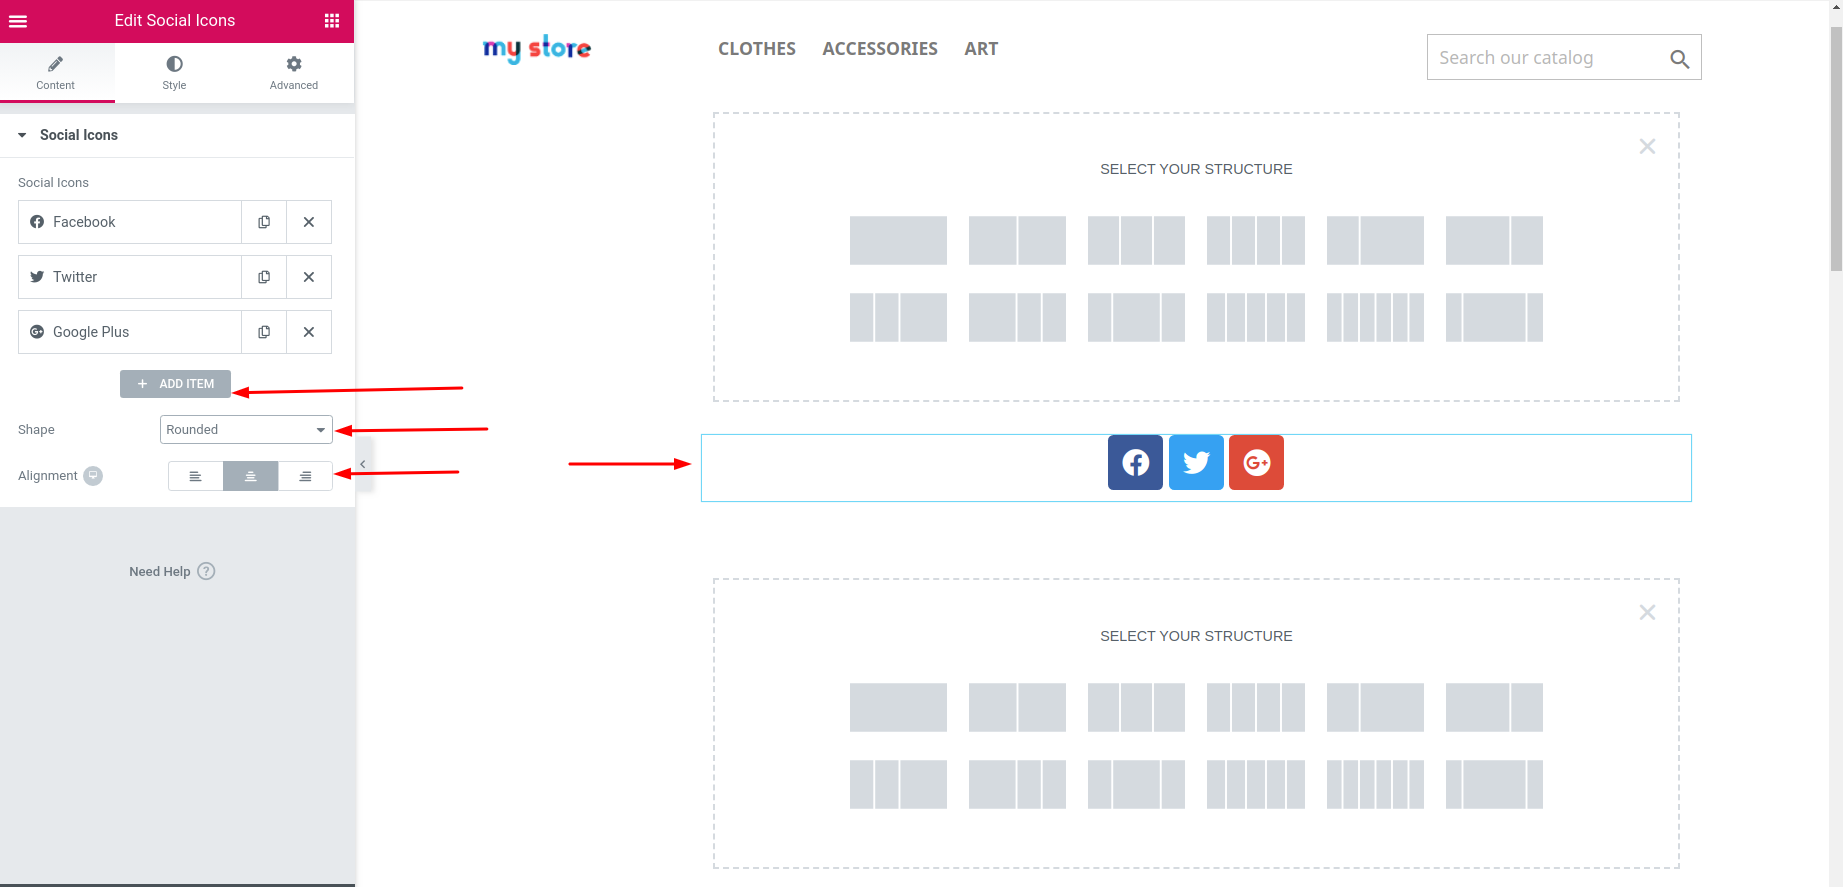
Step 2:
After dropping the selected area it will automatically take you to the content tab you can add the social icons, can give different types of shape(runded, square, circle) and also can give alignment.
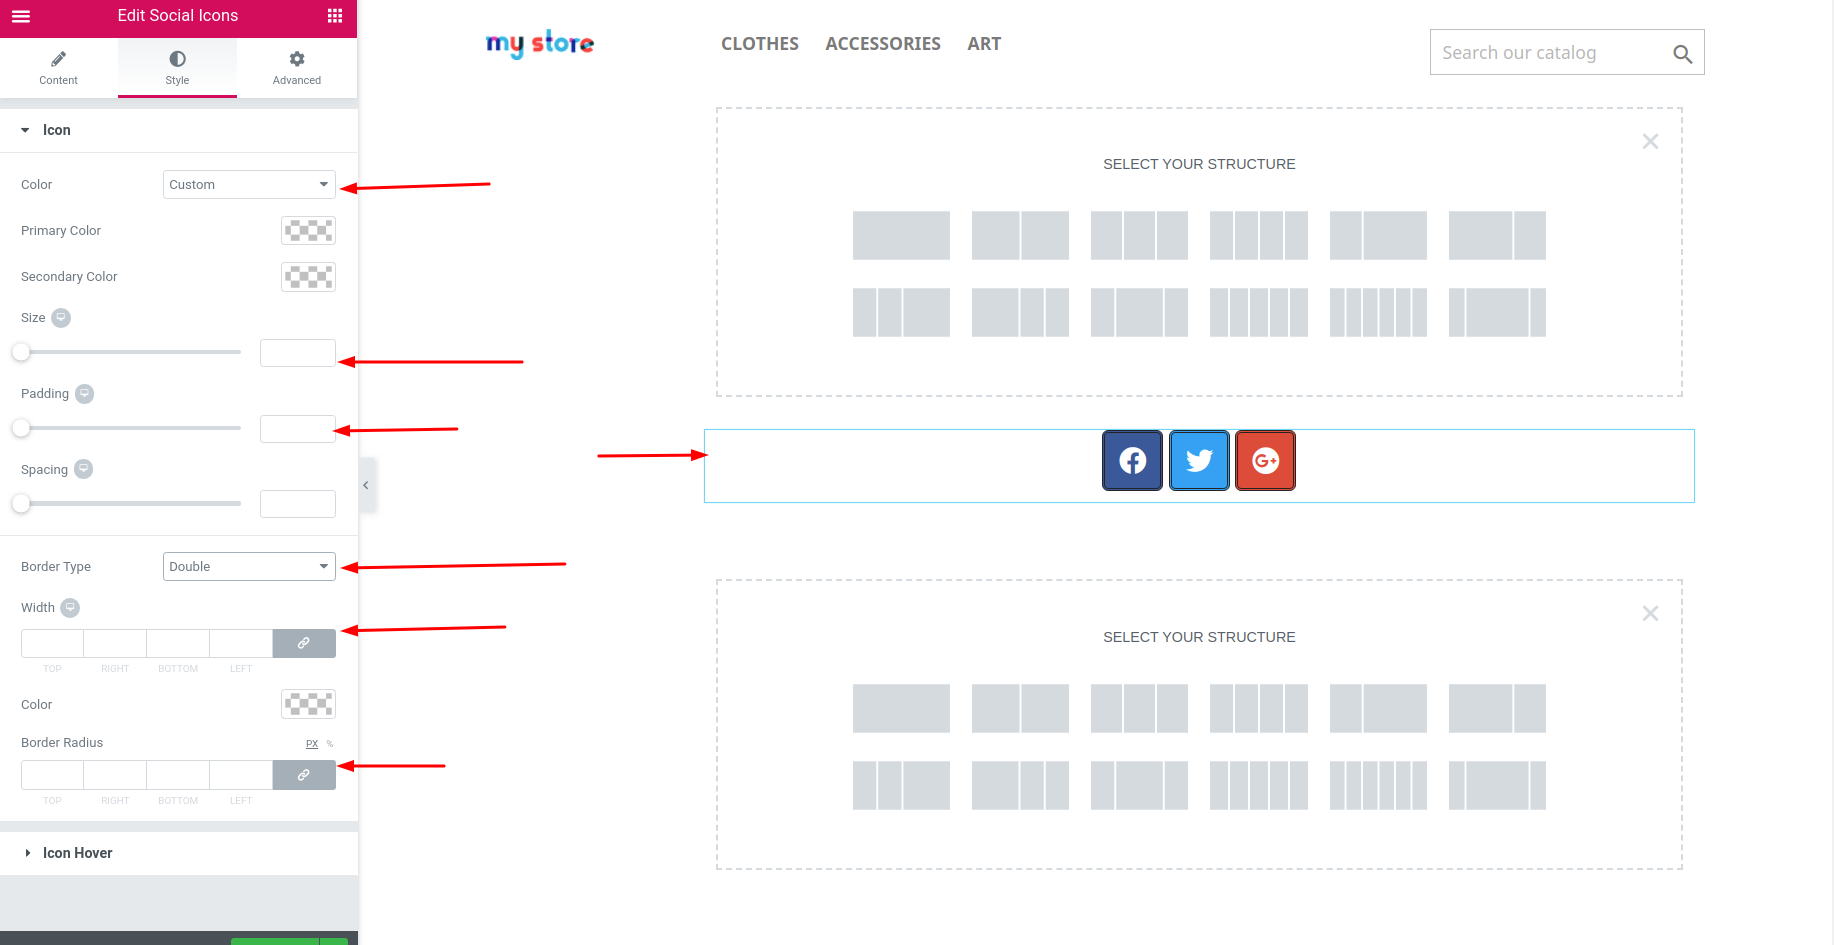
Step 3:
In the style tab you get the options to design your icons. In the icon tab you can give the icon primary and secondary color, size, padding, spacing, and border.
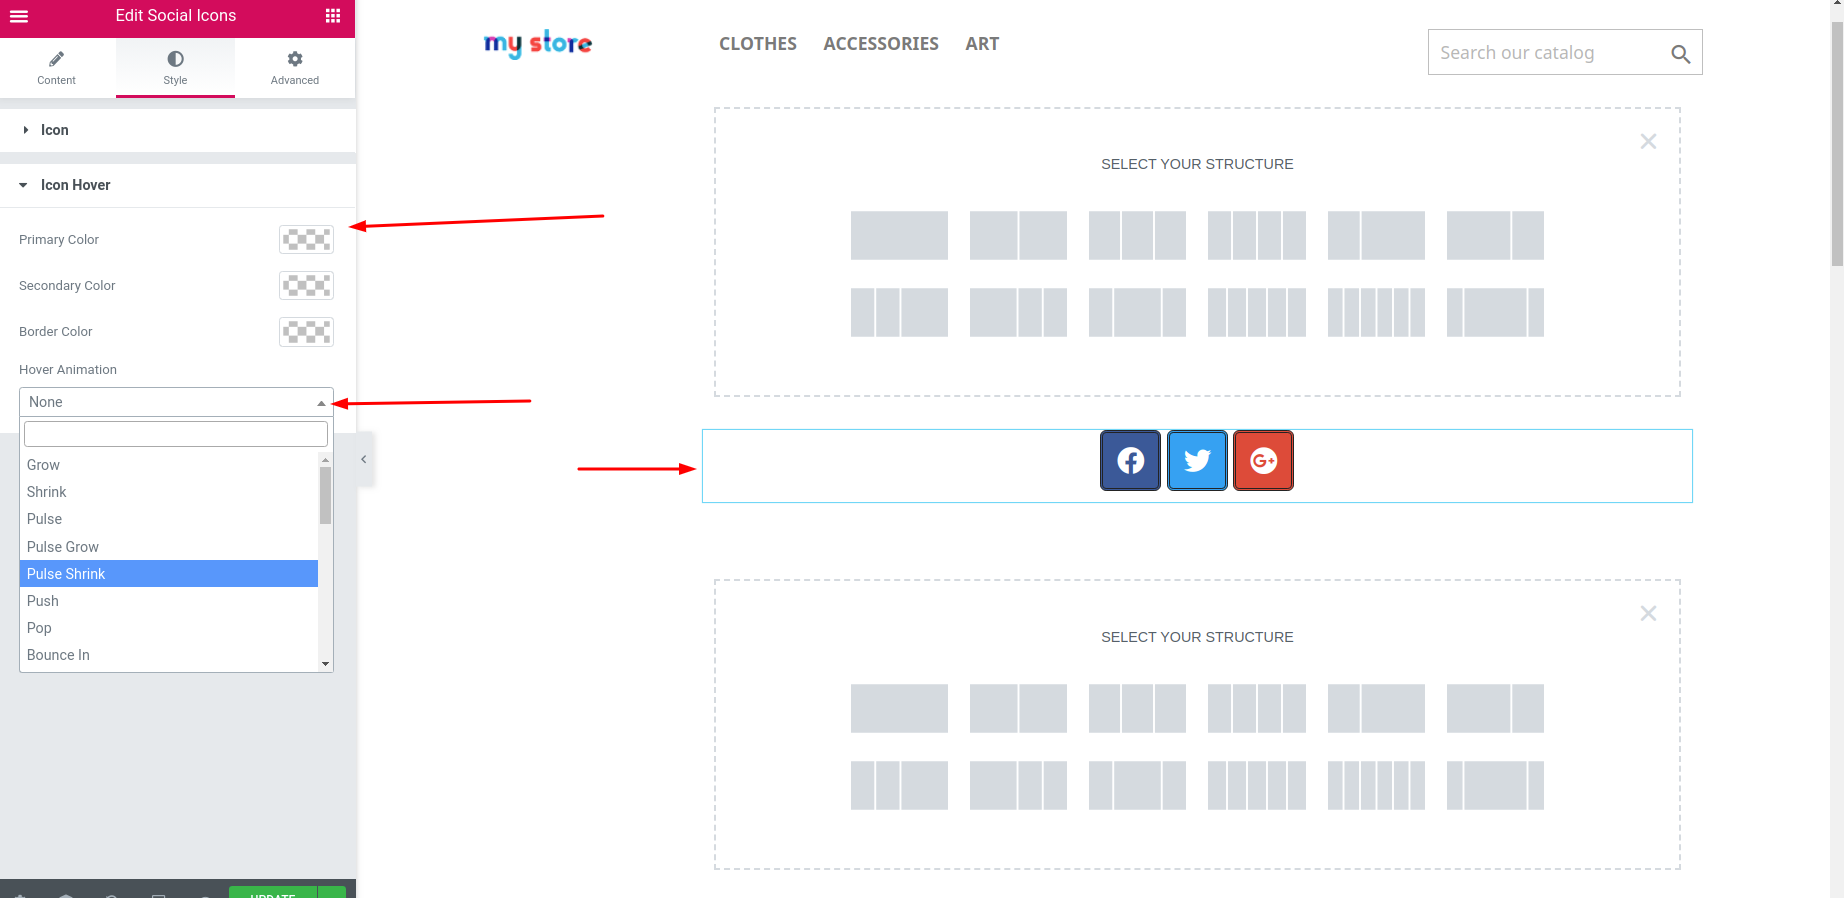
In the icon hover you can give hover animation(grow, shrink, pulse, pulse grow, pulse shrink, push, pop, bounce in) and color.
Step 4:
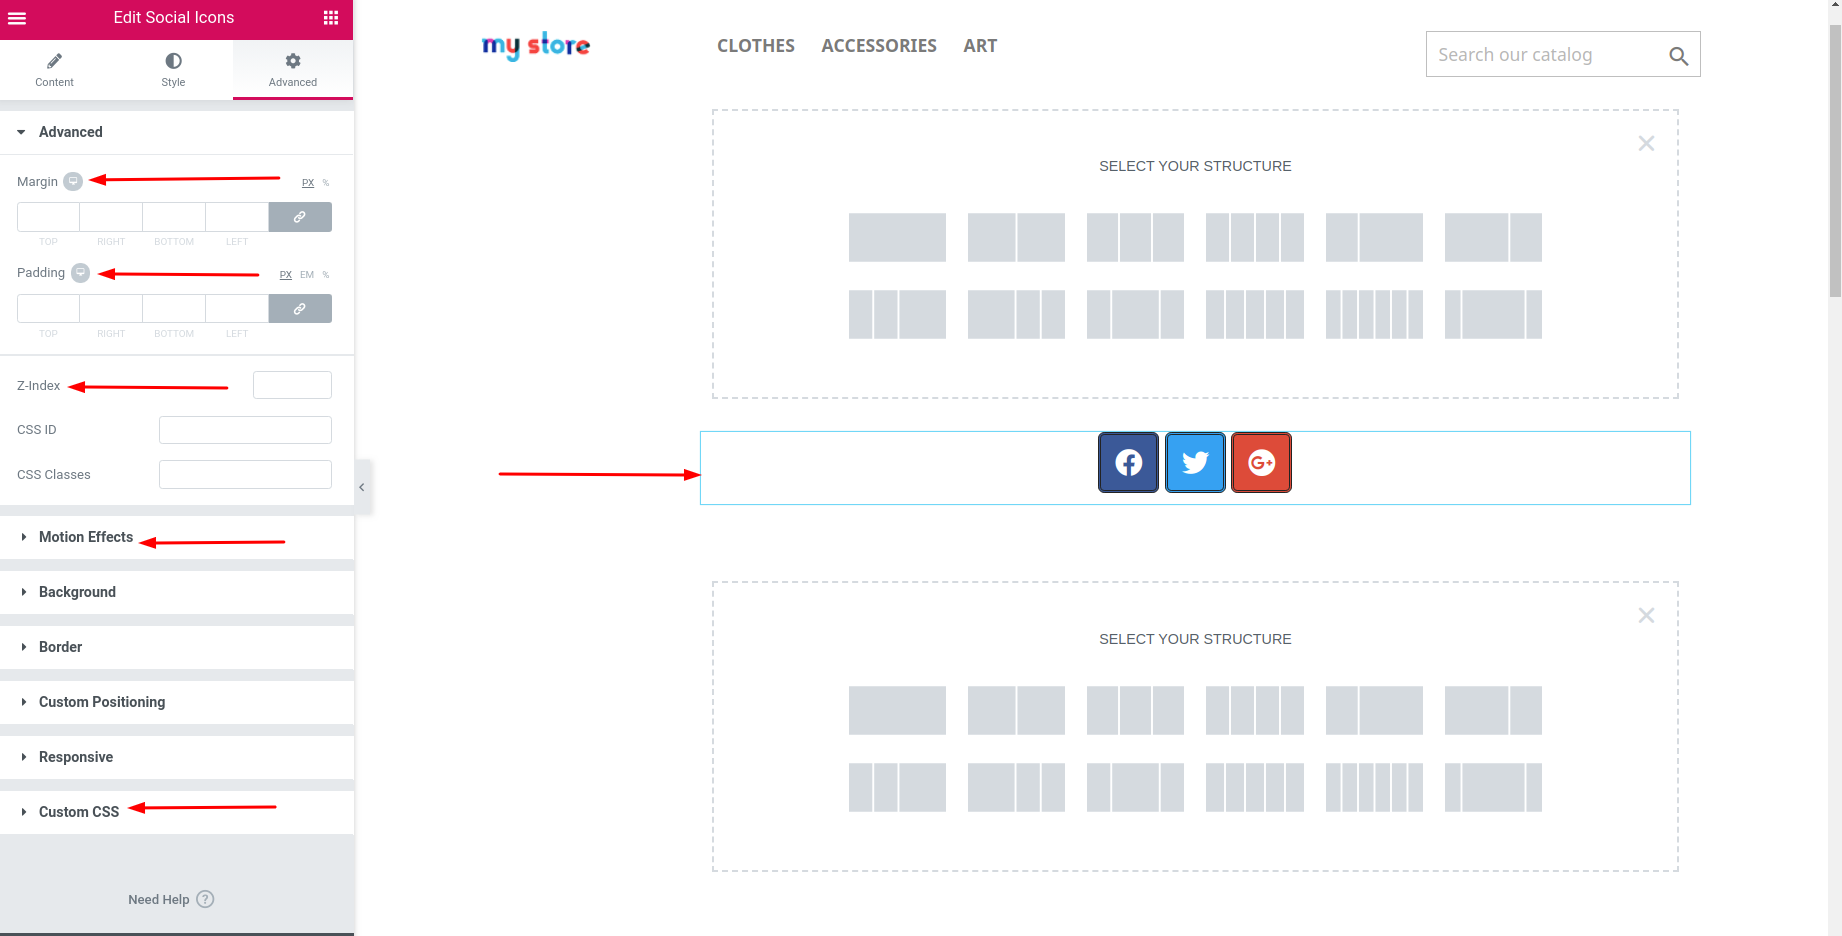
In the Advanced tab you can add the margin, padding, Z-Index, CSS (Id, Class) motion effects(fade in, fade in down, fade in left, fade in right, fade in up), Background, Border, Responsive and others.
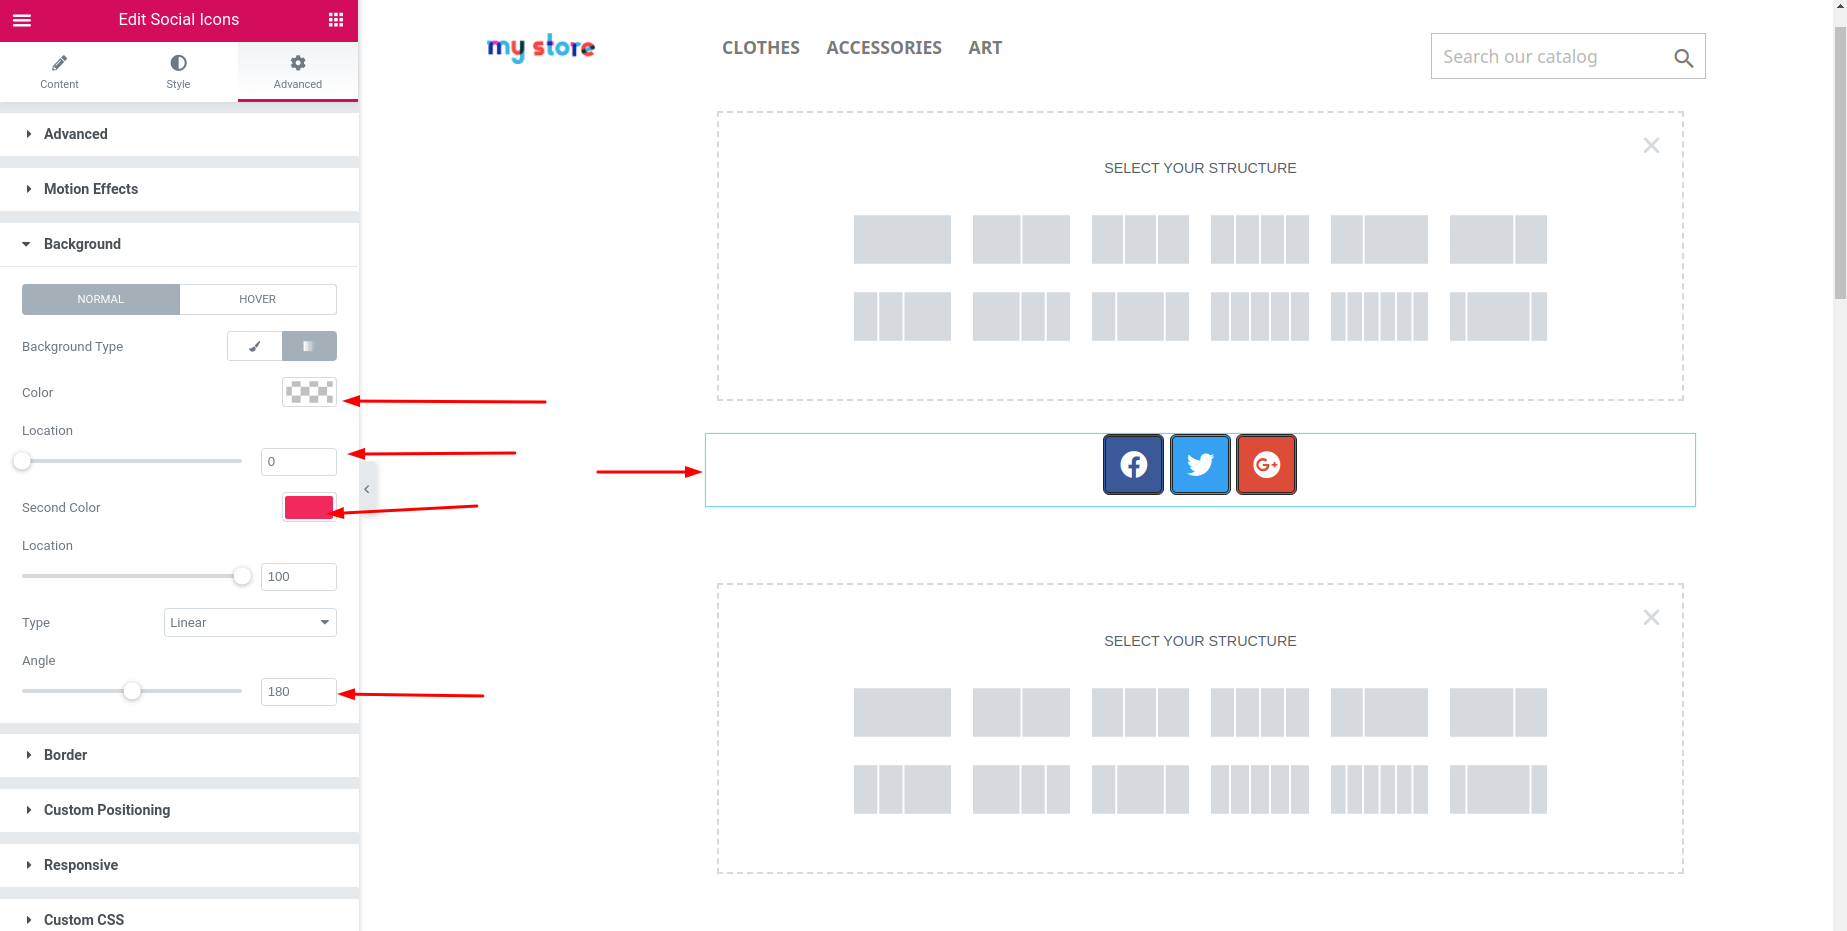
After left clicking on the background you will get two tabs Normal and Hoover. Here you can edit your icons in two ways: classic or gradient. In both ways you can add background image, color, position, attachment, type(linear, radial) angle, location.
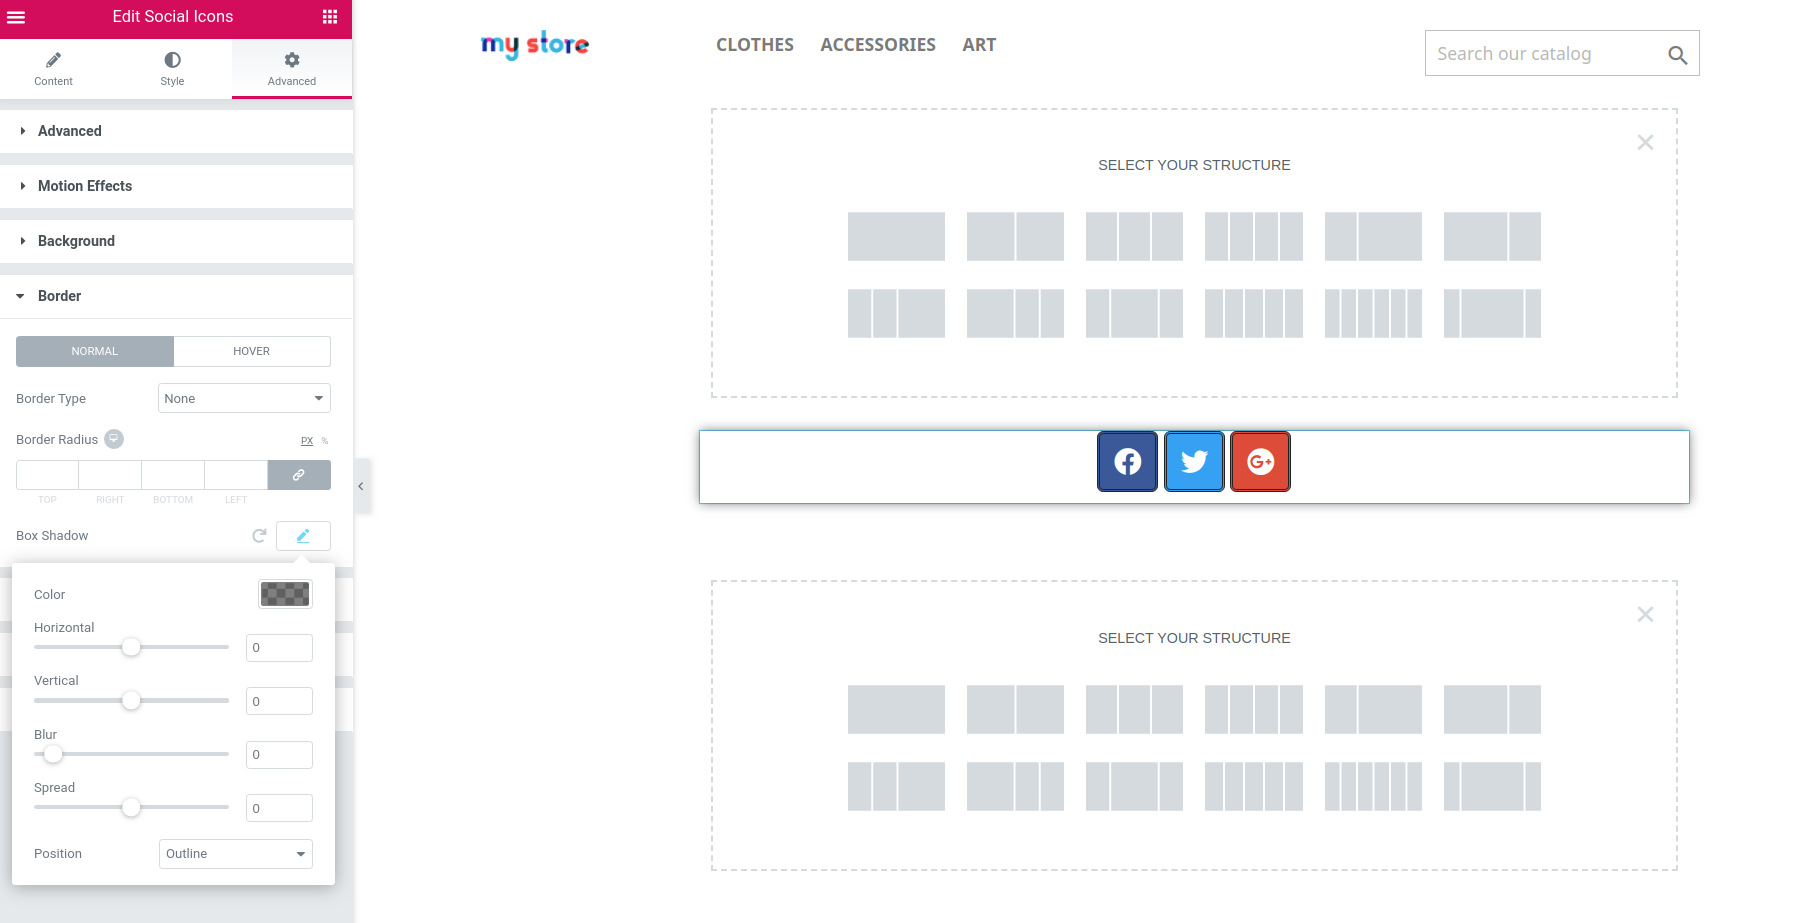
In the Border tab you can edit the border of your social icons in two modes(Normal, Hover). In both modes you will get the different types of border options(Solid, Double, Dotted, Dashed, Groove) and you can give the border radius, box shadow(horizontal, vertical, blur, spread and the position(inline and outline)). You can also add custom positioning, responsive and custom css.
To get new videos, Please Don’t Forget to Subscribe Our Youtube Channel!