If you want to Migrate Prestashop to another server/move Prestashop from localhost to server then you are in the right place. In this article, you will learn the process move Prestashop from localhost to server.
Watch Video: Move Prestashop from localhost to Server
The procedure that we will follow:
- Backup Database from phpMyAdmin.
- Import Database in phpMyAdmin (new server).
- Change to URLs from the Database.
- Move all localhost files to the new server.
- Change the Database information.
- Delete the .htaccess file on the new site.
- Enabling Friendly URL generates.
- Delete cache.
- The error arises during transfer.
Move Prestashop from localhost to server in details
1. Backup Database from phpMyAdmin
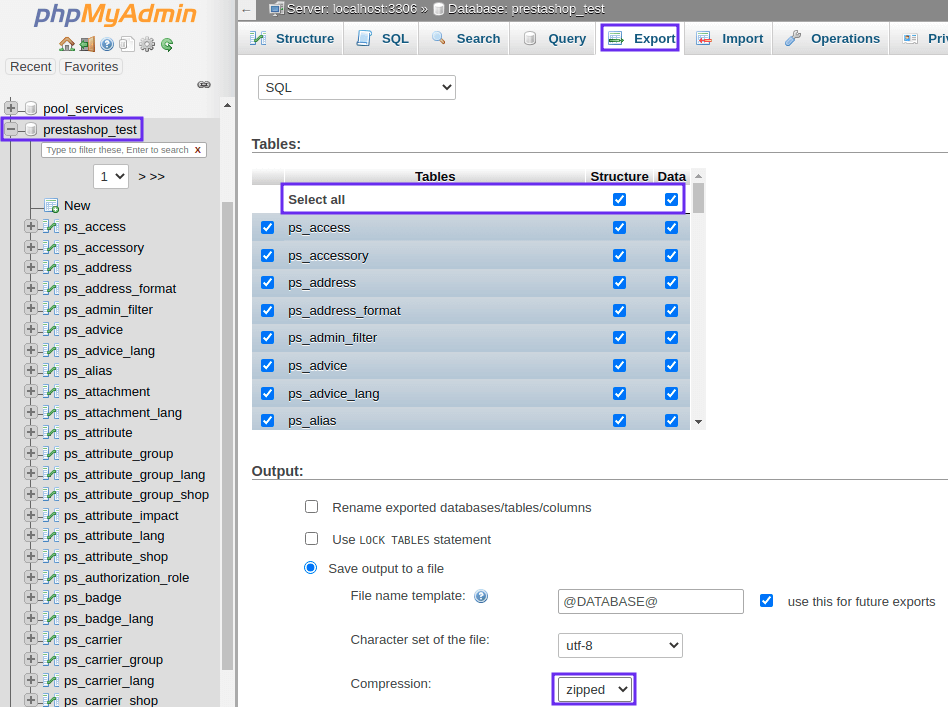
- Step – 1: Go to phpMyAdmin and select database.
- Step – 2: Click Export from the top menu.
- Step – 3: Export method, click custom – display all possible options.
- Step – 4: From Tables, check to select all structure and data.
- Step – 5: In Output > Compression: Select zipped from dropdown.
- Step – 6: Click Go from the end of the page.
SQL will be downloaded automatically.
People who read this article also read: Prestashop Email Templates Edit – Easy Step By Step Tutorial
2. Import Database in phpMyAdmin(new server)
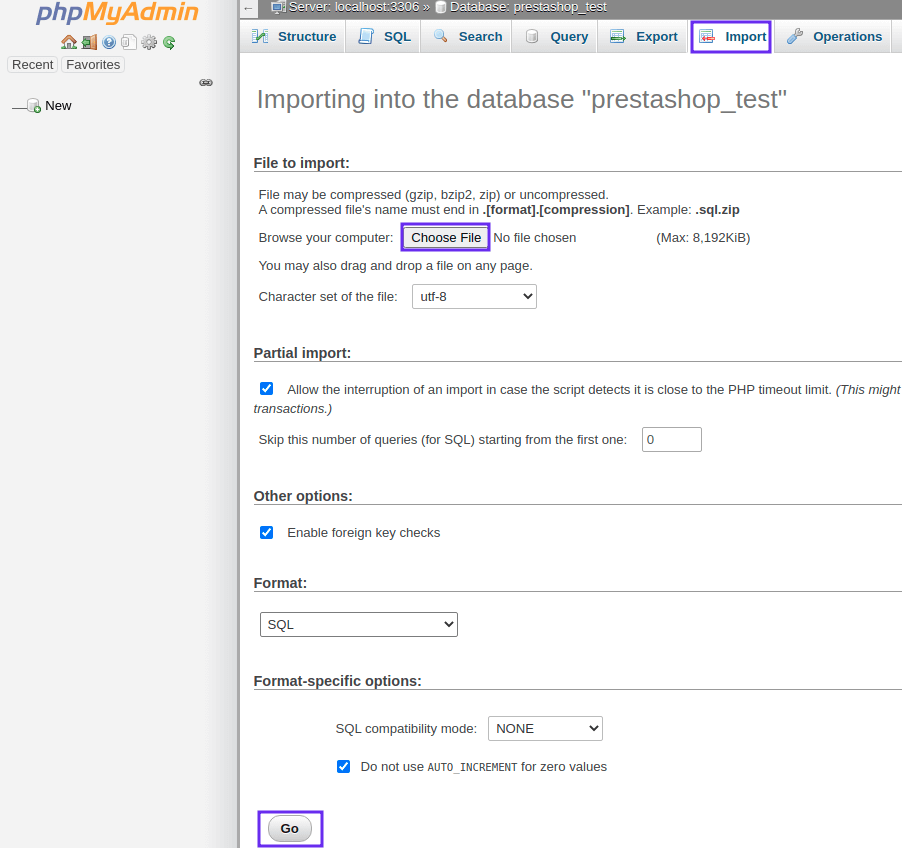
- Step – 1: Go to phpMyAdmin in your live server / new server.
- Step – 2: Click Import from the top menu.
- Step – 3: Click Choose File
- Step – 4: Click Go
3. Change URLs from the Database.
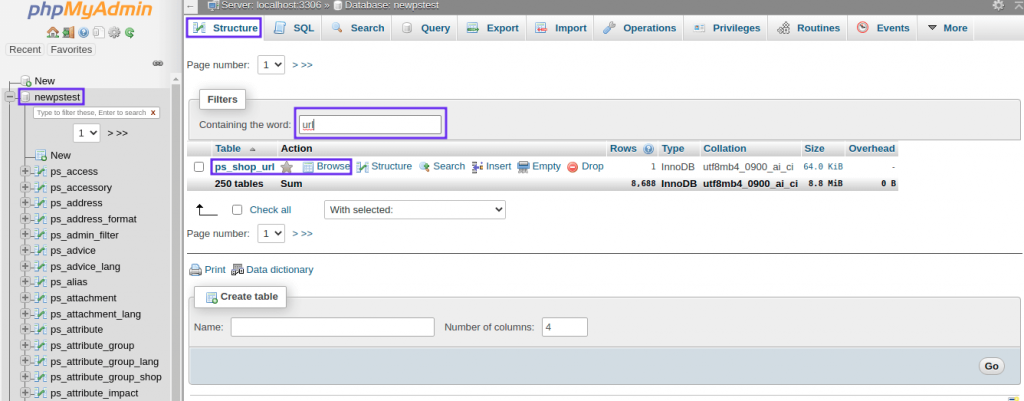
- Step – 1: Select the imported database file.
- Step – 2: Click Structure > filters > Containing the word: search / insert “url”.
- Step – 3: Select ps_shop_url table.
- Step – 4: Click on Edit.
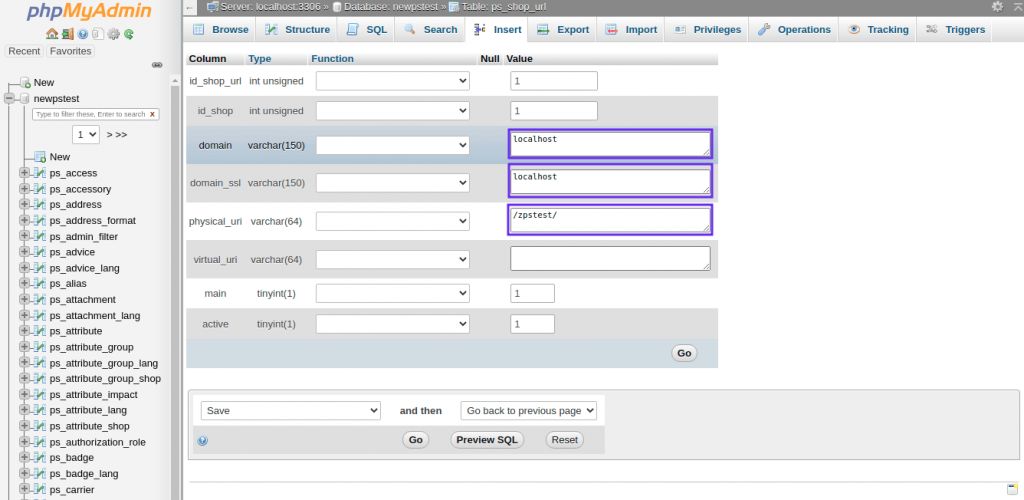
- Step – 5: Change the necessary things like domain, SSL, physical_uri.
- Step – 6: Click Go.
When you click on Edit in the next step, you will get the picture below:
4. Move all localhost files to the new server
- Select all localhost files and copy them.
- Paste them in public.html (live server).
5. Change the Database information
- Open your installed live server.
- Open Prestashop installed directory.
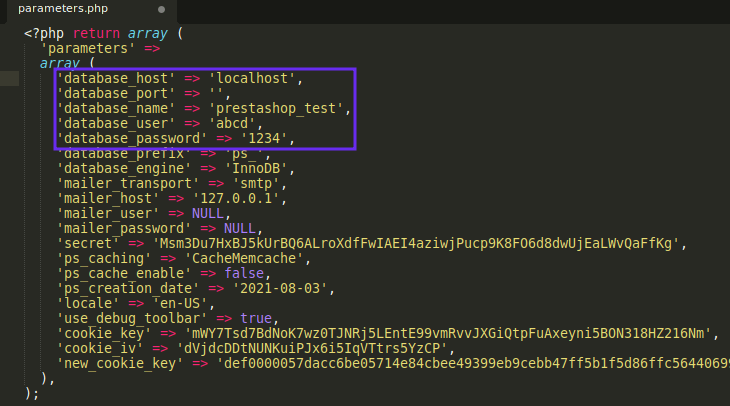
- Go to app > config > parameters.php folder.
- Change the necessary things like database_host, database_name, database_user, database_password.
6. Delete the .htaccess file on the new site
- Go to the public.html / folder where you paste the files.
- Download the .htaccess to keep its backup.
- Delete the .htaccess file from that folder.
7. Enabling Friendly URL generates
- Log in to your site(Back Office).
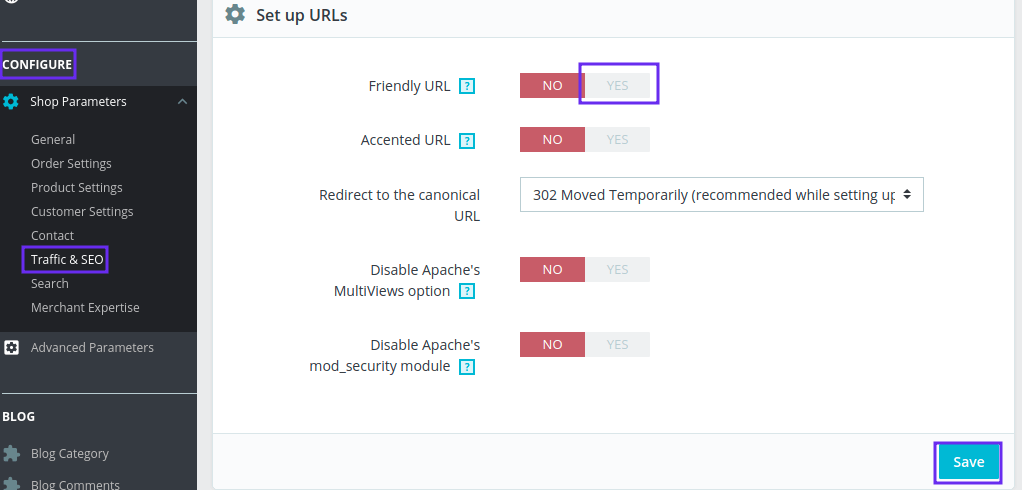
- In the left menu, Find Configure and click Shop parameters.
- Enable the Friendly URL. It will generate a .htaccess file.
8. Delete cache
When you finish above the task, we are the final stage of move Prestashop from localhost to server. We have to delete the cache.
Delete cache from hosting:
- Open your installed live server.
- Go to this location: File Manager / site-hosted-folder / var / cache
- Delete the cache folder.
Delete cache from sites back end:
- Log in to your site (Back Office).
- Go to: shop parameter / Advance parameter / Performance / clear cache
It’s time to test move Prestashop from localhost to server work or not. Go to your website and check if everything is working perfectly or not.
9. Error Case while Move Prestashop from localhost to server
Error 500:
If you get Error 500 then you can enable debug mode.
ENABLE PRESTASHOP DEBUG:
If you have access to the admin panel ( back office ) then login in and CONFIGURE menu under Advanced Parameters > Performance
If you don’t have access then follow this:
From hosting /config/defines.inc.php
Change this line: define(‘_PS_MODE_DEV_’, false);
to this: define(‘_PS_MODE_DEV_’, true);
Change this line: ini_set(‘display_errors’, ‘off’);
to this: ini_set(‘display_errors’, ‘on‘);
Now it is enabled, so if any error occurs then you will get the error alert in your browser. Debug is displayed on your browser tab when there’s an error. You can log in to your back office and you can test what the problem is. After finishing the debug, turn off the debug mode so the hacker will not get any advantages. If you feel any issues to apply the above process, feel free to explore our PrestaShop Development Services.
Read More:


