PrestaShop Search is a key component of creating an effective user experience on your PrestaShop website. If your search is slow or difficult to use, customers will not be as likely to find what they are looking for, which could damage your store’s reputation as an eCommerce owner. In this article, we are going to learn how to set up a PrestaShop search. In this article, we will discuss how to use Prestashop’s search features to improve your results. You will learn how to set up a PrestaShop search and see ways to make your results more relevant and useful.
How to Set Up the PrestaShop Search
PrestaShop 1.7 back office contains a comprehensive set of search configurations, allowing a store admin to perform a valid search without changing PrestaShop source code.
- First login to the PrestaShop back office.
- Go to Configure > Shop Parameters > Search. Now you will see a new window.
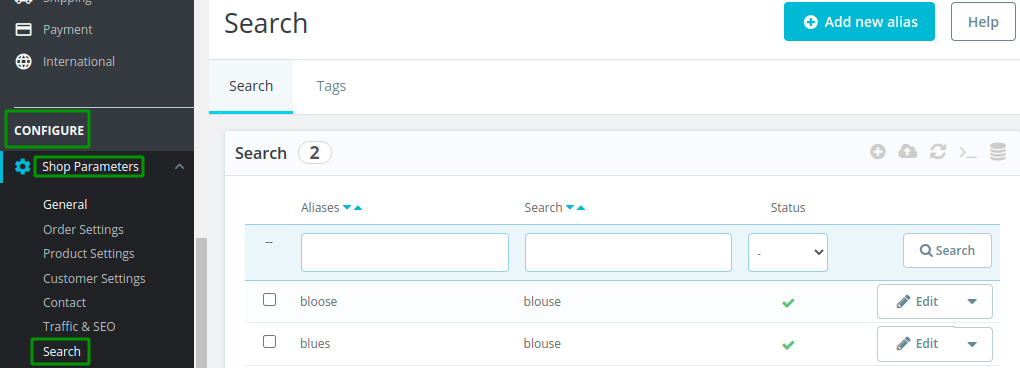
PrestaShop search aliases are the mistakes that customers are predicted to make, and for the system to produce accurate results, these aliases should be connected to the properly spelled words.
If you want to make a new alias then just click the Add new alias button from the upper right corner. Now you will see a new window.
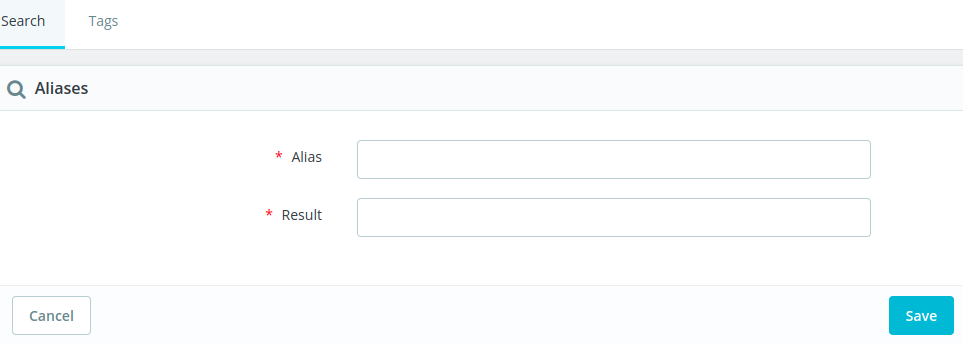
- There you will see the two fields named Alias and Result. Put each alias separately by a comma.
- Click the Save button when finished.
The Indexing section contains information on the number of products that are presently in your catalog and those that have been searched.
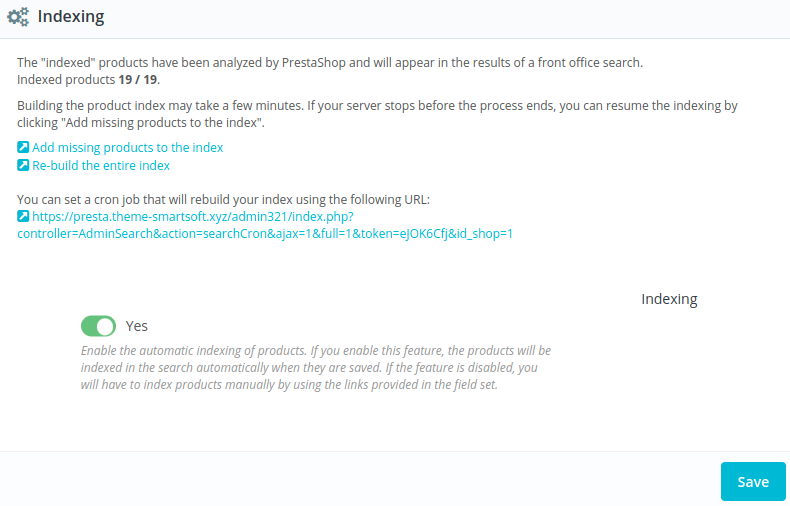
- Enable the indexing by switcher. The system will automatically index the products when they are saved, which can make finding them easier. If the indexing is disabled, then the store will perform indexing manually.
If you scroll down then you will see a search section with different options.
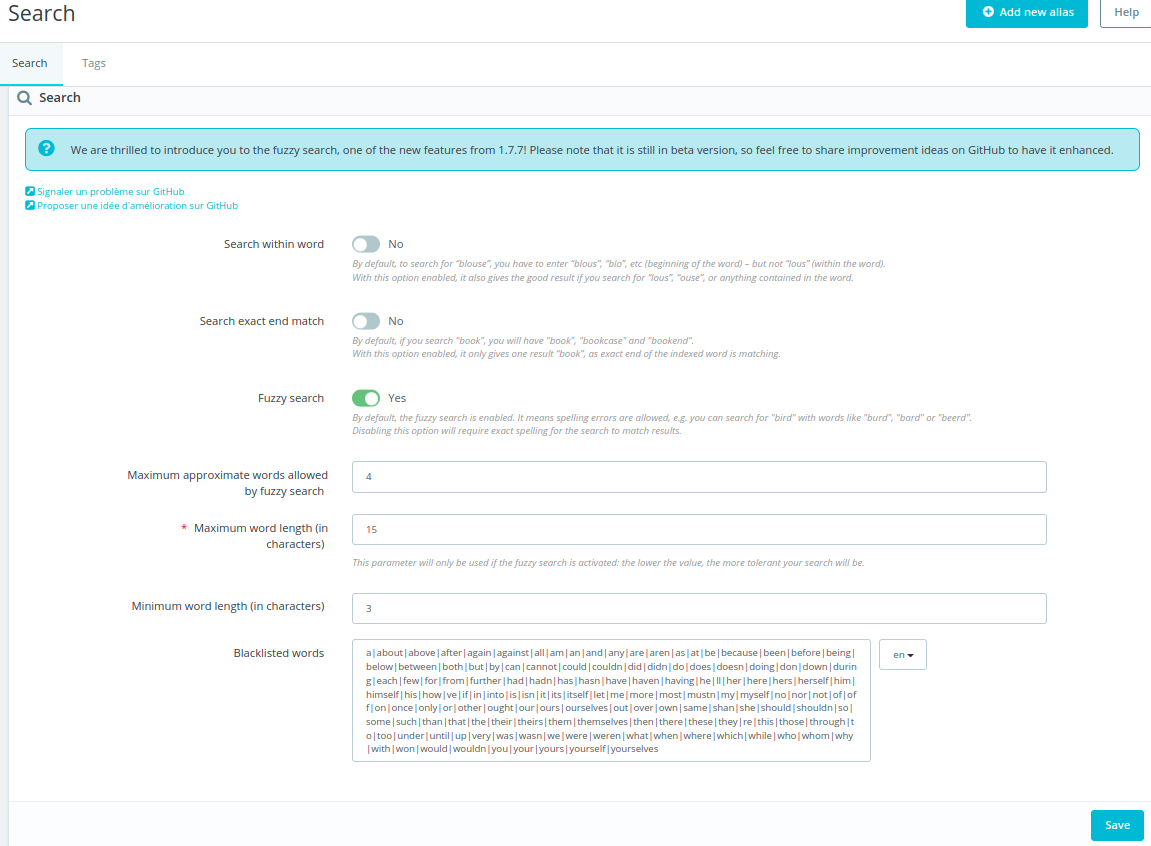
- Search within the word: This allows the search to put out results to the search queries. It enables the search within the whole word. It also checked if the search item is contained in the indexed word.
- Search exact end match: It enables a more precise search with the end of the word. This will check if the search term is the exact end of the indexed word.
- Fuzzy search: PrestaShop introduces fuzzy search from 1.7.7 and it is still in beta version. This fuzzy search will allow users to search on string matching.
- Maximum approximate words allowed by fuzzy search: This is the Maximum approximate words accepted by fuzzy search.
- Maximum word length (in characters): If the fuzzy search is enabled then this parameter will be activated. This is the maximum length of words that can be searched.
- Minimum word length (in characters): The minimum number of words that can be indexed.
- Blacklisted Words: The list of words that will be blacklisted. This kind of word will not index for searching. So insert your indexing word by spearing pipe.
- Now click the Save button.
Weight
If you scroll down then you will see the last section named weight. In PrestaShop, weight stands for the importance and relevance of a product attribute for the rankings. The higher the number you assign in the attribute field, the higher it will appear in the search output. If you insert the 0 then it will exclude that field from the search index.
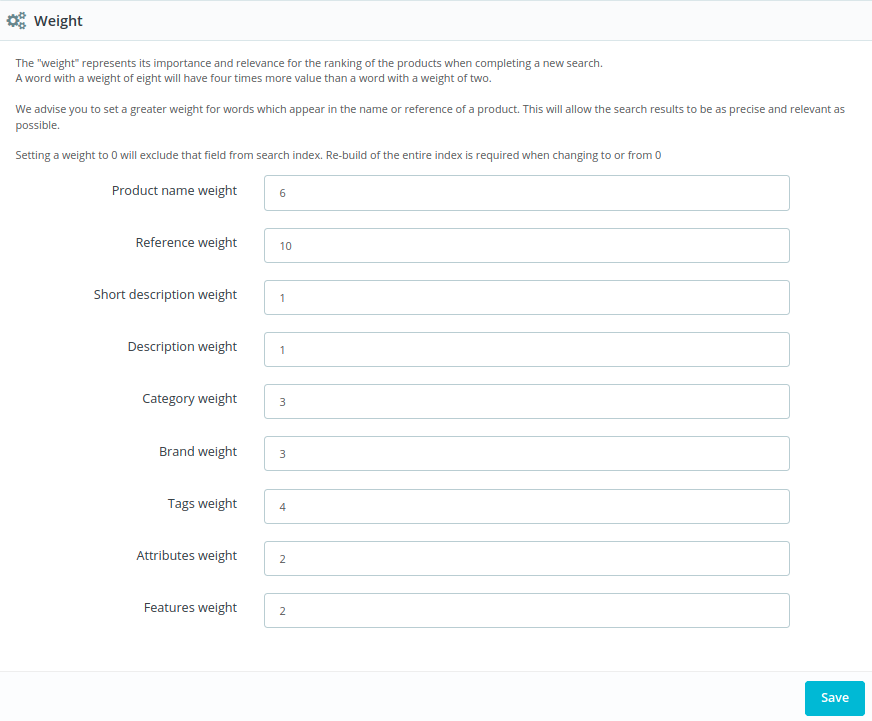
After changing the value, click the save button from the left corner.
Add New Tag
In addition to the settings found on the top search page, there is a Tags tab where users can customize their search by tagging products.
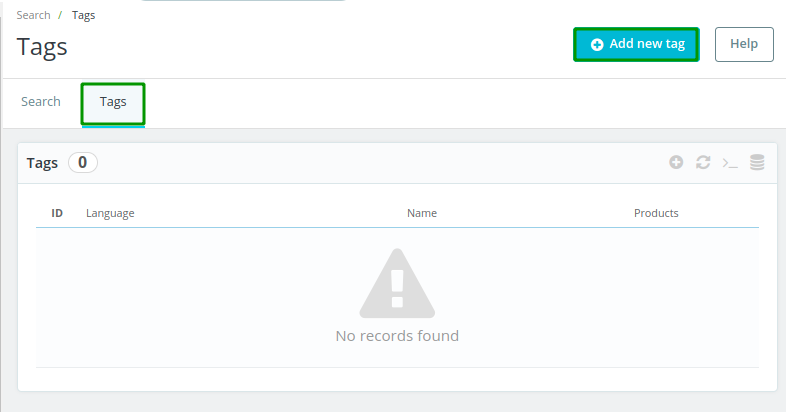
If you click the Add new tag then you will see a new window. You have to fill in the Name and other following things.
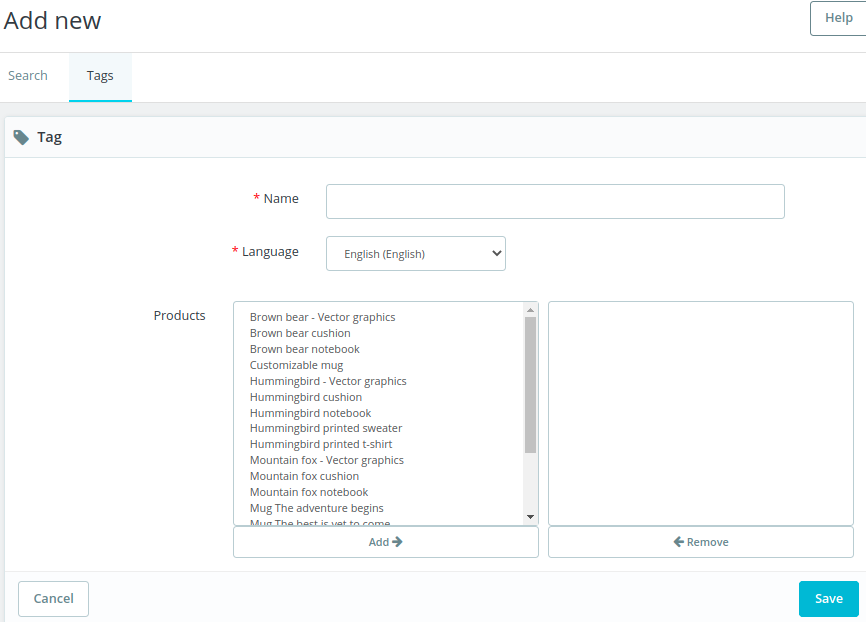
Name: This is the tag name that you have to insert here.
Language: Select the language from the dropdown list.
Products: This is the product list where the tag will be assigned.
PrestaShop provides a variety of search configurations that can be used to search for products and pages in the back office. These configurations cover the basic needs of most users.
If you feel any issues to apply the above process, feel free to explore our PrestaShop Development Services.


