If you are looking to customize the order and want to use the shopping cart module then this article is for you. In this article, I will show you the complete guide of using the PrestaShop shopping cart and order settings.
PrestaShop shopping cart module is to use to display the shopping cart icon on your PrestaShop store pages and the number of items it contains. This is the PrestaShop default module that exists after installing the PrestaShop in your store. This module will catch your customer’s attention so that you can let them know at one glance about the product they want while browsing your store.
This is a simple module to configure whether you want the ajax mode to be applied to the cart or not. This module recommends keeping it enabled as it allows an automatic update.
When the visitor selects a product, the cart will indicate that the number of items shopped will be automatically indicated next to the icon in the header of your store.
How to Configure the PrestaShop Shopping Cart Module
If the PrestaShop shopping cart module is not installed for you then you can configure it.
- Just log in to the back office.
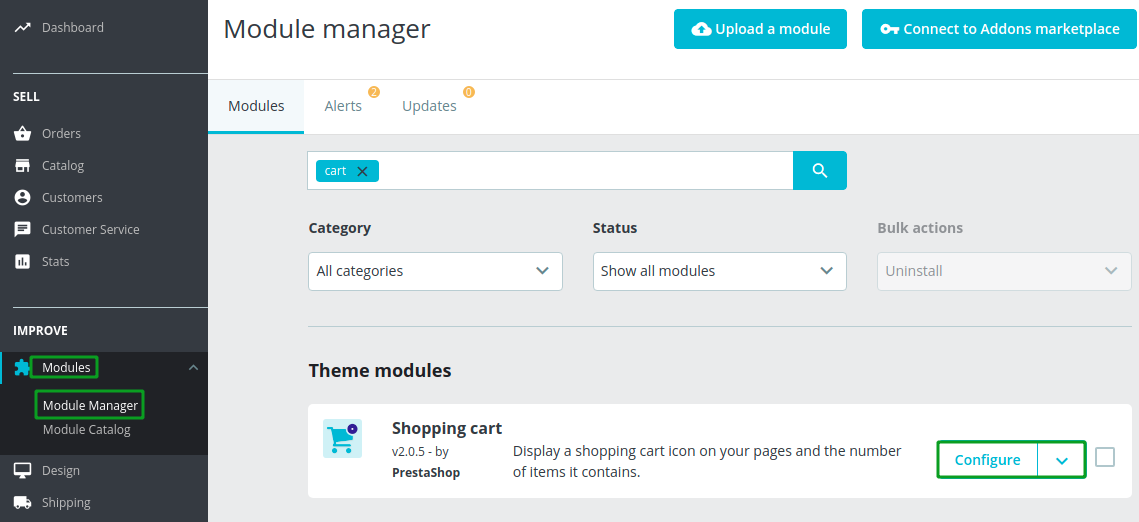
- Module > Module manager > search “cart” > click “Configure“

- Now click the Ajax cart enable and click save from the PrestaShop shopping cart module.

This Ajax cart will provide the floating effect for your product when the “Add to Cart” button is clicked.
Configure the order settings
To configure the order setting, follow the following process.
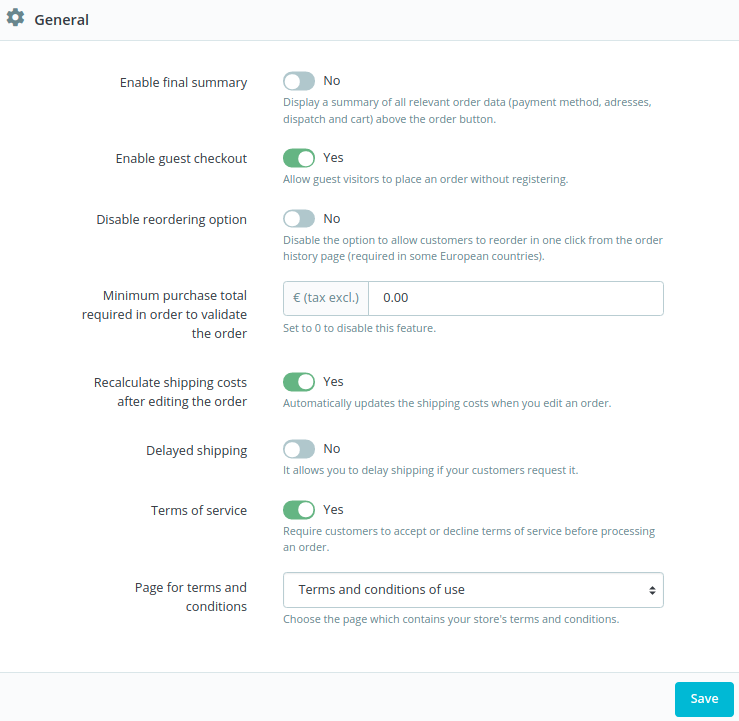
- Go to the Shop Parameters > click “Order Settings”

- Enable final summary: It will display the summary of all relevant order data like payment method, address, cart above the order button.
- Enable guest checkout: It will allow your visitors to place an order without registering.
- Disable reordering option: Allow customers to reorder in one click from the order history page.
- Minimum purchase total required in order to validate the order: This is a minimum purchase amount that customer should meet in order to proceed with their checkout.
- Recalculate shipping costs after editing the order: It will automatically update the shipping costs when you will edit the order.
- Delayed shipping: It allows a customer to delay shipping if the customer request it.
- Terms of Service: It allows you to choose whether you want or not to required the customer to accept your Terms of Service before processing their order.
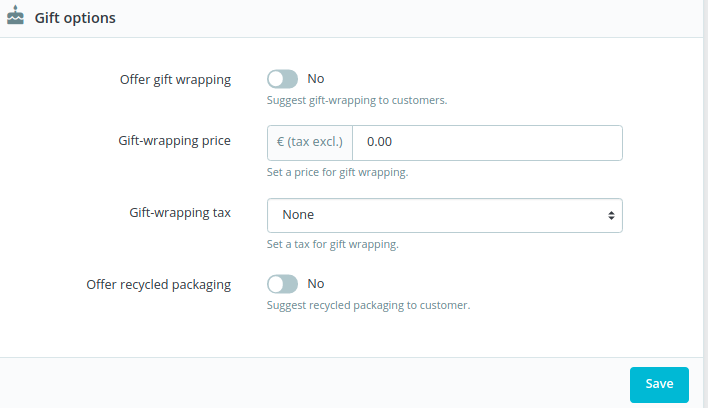
If you scroll down the page then you will see the Gift options. You can customize the gift settings from here.

If you want to enable this option then you can do it by simply clicking the switcher of Offer gift wrapping.
There you can add the Gift wrapping price and gift wrapping text. You also can offer recycled packaging.
If you feel any issues to apply the above process, feel free to explore our PrestaShop Development Services.


