
Do you manage the PrestaShop Order Status? When customers order items from your online store, they need to understand how their order is progressing. This information can be found in the order status column on the product pages. If you want to customize this column or add new statuses, you can do so in PrestaShop 1.7 by editing the default order statuses available. Alternatively, if you feel that these default statuses are enough for your needs, there is no need to edit them – you can create your own Statuses objects using the admin panel!
Edit and Manage the PrestaShop Order Status
The order status allows you to keep your customers updated on the progress of their purchase, such as shipping, awaiting payment, or delivery. So we are going to configure the PrestaShop Order Status.
- Log in to the PrestaShop back office.
- Go to the Shop Parameter > Order Settings > Statuses
- Now you can see a new window where you can customize and configure them.
- You can change the order of items in your list by selecting a new status from the pre-defined order statuses. Each status has a distinctive color, icon, and title.
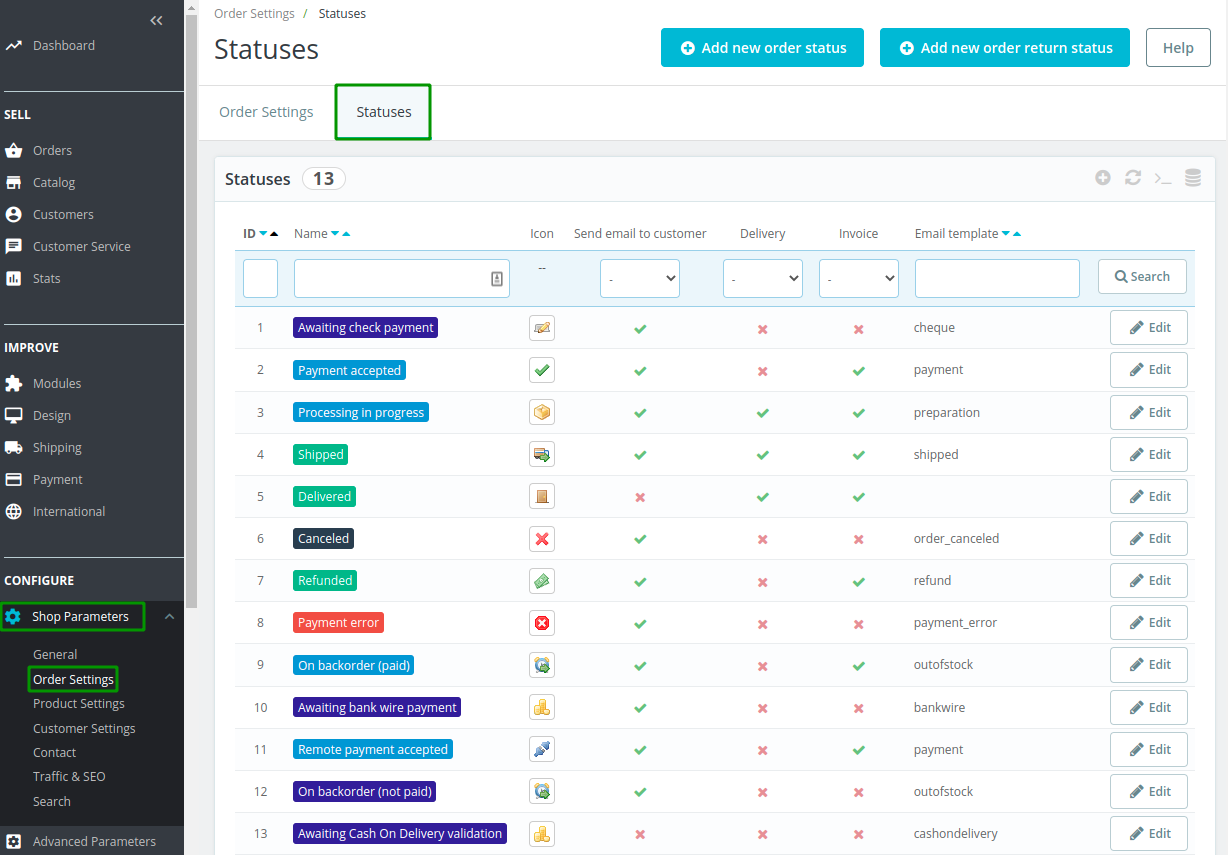
- To add a new order status, click the Add New Order Status link on the Order Status page.
- The list of statuses is separated into two sections: Statuses and Return Statuses. The difference between them is that Return Statuses are used rarely.
Each status has a set of features
- Icon: It will show the status image.
- Send an email to the customer: If the order status is changed then the customer will be notified via email.
- Delivery and Invoice: It will allow the customer to download the invoice.
- Email Template: This template is chosen for the current status.
Now we are going to Add the New Order Status for the PrestaShop Order Status.
- To add the new order status, just click the Add New Order Status.
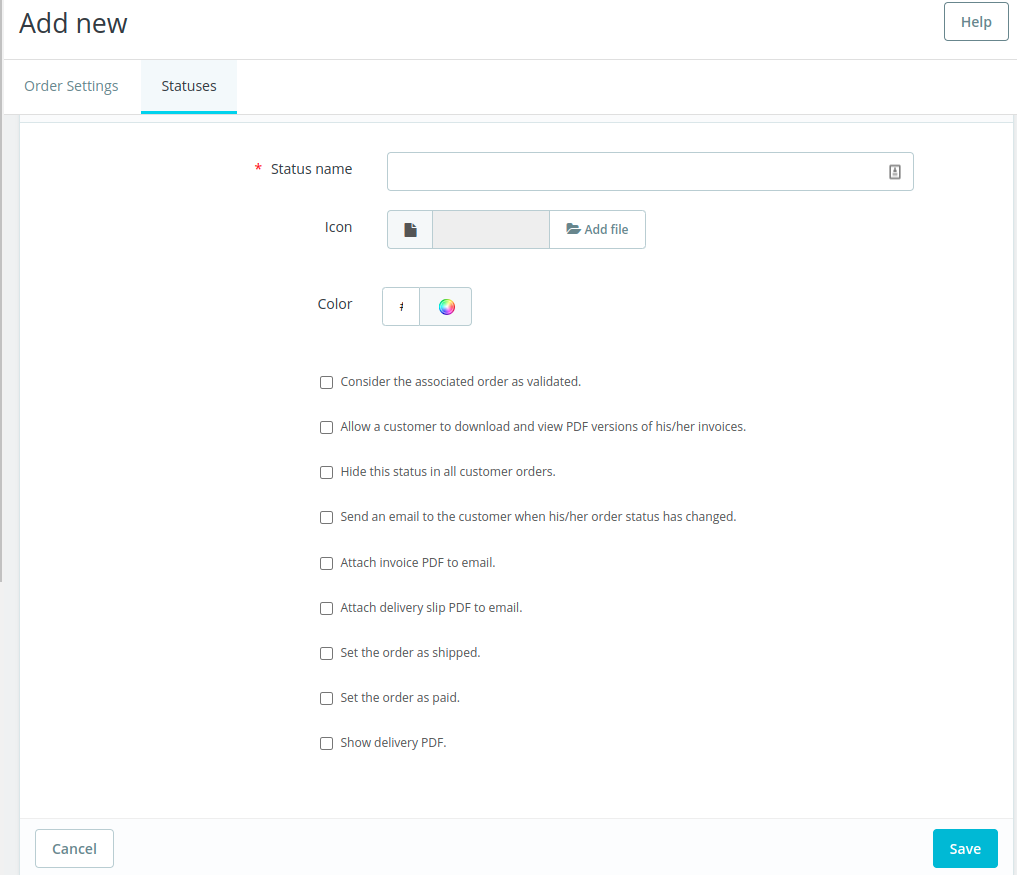
- Status Name: You have to put the status name here.
- Icon: Icon of the status.
- Color: Color of the Status.
- Consider the associated order as validated: This status marks all associated orders as “paid” and places them in the same status.
- Allow a customer to download and view PDF versions of his/her invoices: If you do not check this box, then your invoice will be emailed to the customers automatically.
- Hide this status in all customer orders: To create internal status, for you and your team, customers will never see this on their order status page.
- Send an email to the customer when his/her order status has changed: If you check this, then a drop-down menu will appear so that you can choose which mail template to use.
- Attach invoice PDF to email: You can send the email to the customer with the delivery slip in PDF format attached.
- Attach delivery slip PDF to email: email send to the customer with the delivery slip in PDF format attached.
- Set the order as shipped: If you checked to enable when the order is shipped, it is not possible to set it back to the previous status.
- Set the order as paid: If you checked it enable, and if the order is set as shipped then this is not possible to set it back to the previous status.
- Show delivery PDF: It will display the delivery PDF.
This is all about the PrestaShop Order Status, if you have any questions regarding the PrestaShop Order Status then you can comment.

If you feel any issues to apply the above process, feel free to explore our PrestaShop Development Services.