
If we want to customize the Prestashop menu that comes by default in the Prestashop platform, we can do it with the images we want easily and quickly
If you are not convinced by the Prestashop menu that comes by default in Prestashop, you can customize it to your liking and choose the images you prefer to add together with the subcategories or simply by replacing them with the name of those subcategories, it is something that depends on you and your preferences.
People who read this article also read: How To Setup The Prestashop Facebook Pixel For Free
Prestashop Menu
In today’s article, we will show you how to customize the menu of your Prestashop 1.7 store with the images that you choose because the menu is one of the areas of a web page that is displayed first and creates more impact, you have to take care of it carefully the type of visual content we include in it.
Prestashop menu: clear, simple and attractive
The menu that comes by default is quite simple and when we see it in the demo at first, it may be what we are looking for or on the contrary, we want to customize it to differentiate it from the rest. When we start to configure it in the back office, we think that it is going to be difficult due to the large number of options and configuration that we must carry out. Nothing is further from reality, with this trick that we show you below, it will be more than simple to customize the Prestashop menu of this e-commerce platform.

A menu must be clear, intuitive, and simple so that the future client can develop with complete peace of mind and security and end up completing the purchase, therefore, we are not going to complicate more than necessary, right?
Customize the Prestashop menu of your online store
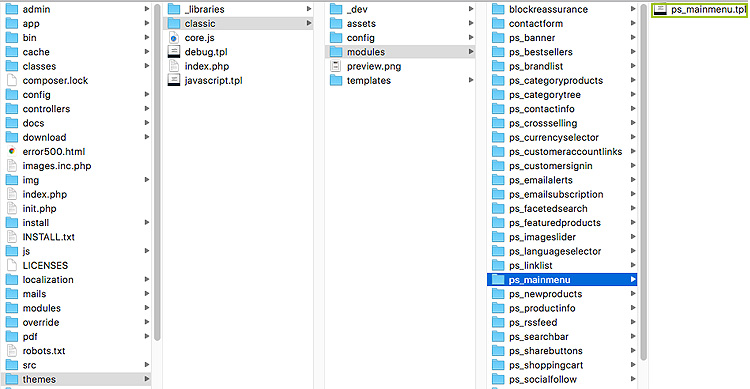
We will simply upload the images in a folder that we will call “menu” and that we will insert in the “img” folder of our main “prestashop” folder so that it is from there, from where the images are “taken”. We will also modify the “mainmenu.tpl” file so that the images are loaded automatically and the “custom.css” file that is inside the “assets” folder so that the measures and rules are arranged to our liking.
Let’s see it with a simple example because just by modifying a couple of things as we mentioned, we will see a quite significant and attractive change that is what we are looking for.
To perform this action, you have to keep in mind that you need to modify several files such as ps_mainmenu.tpl (automatic loading behavior of photos) and custom.css ( css rules for the menu), upload a .jpg file in our case because we are going to upload only one image but in your case you will need more. The jpg is the file type for the image, and we will have created the “menu” folder with the example images (one in our case). The objective, as we mentioned, is to have an easy-to-manage and very attractive Prestashop menu.
Steps to add images to the Prestashop menu
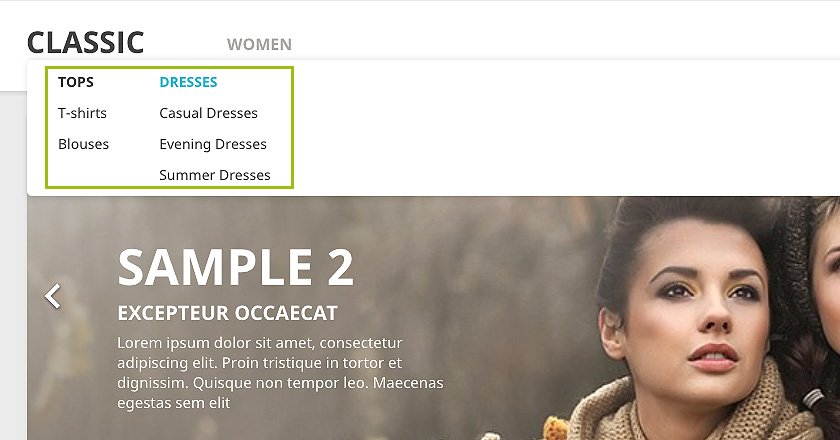
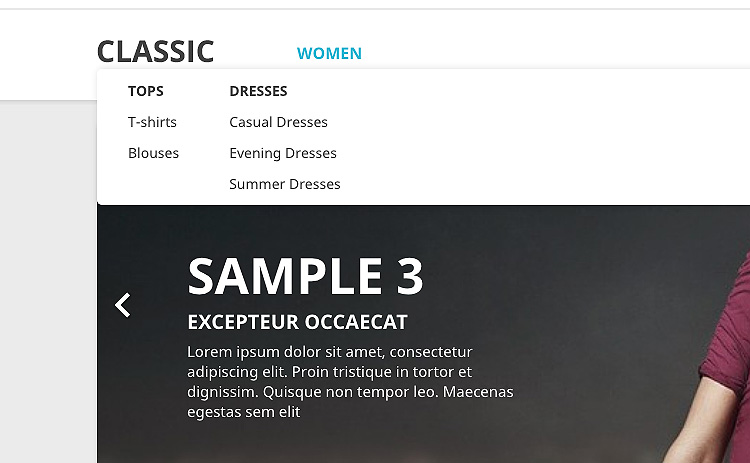
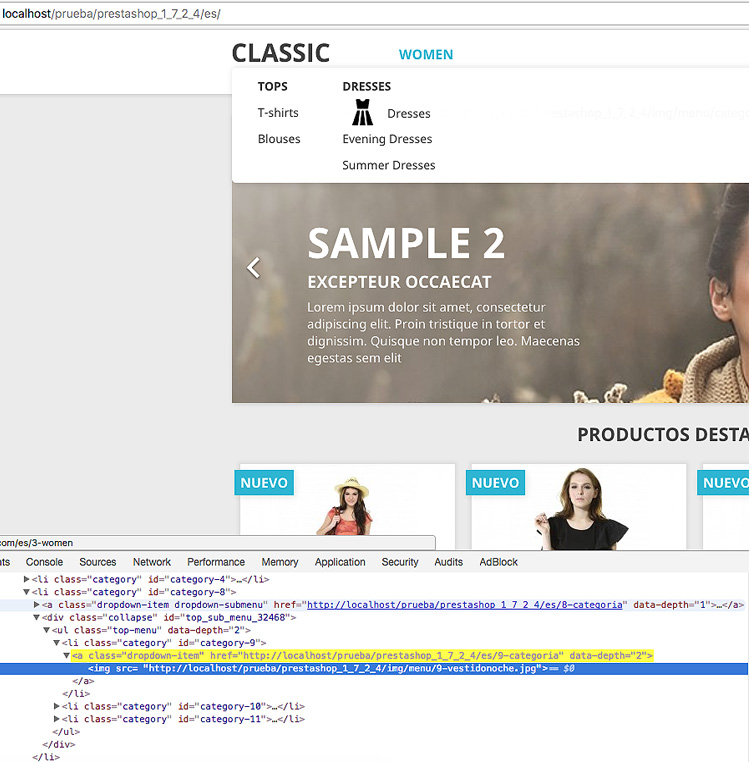
First of all, we will create the necessary subcategories for “Dresses” for example in which we will replace the name of the subcategory with an image or simply add it next to the name in our case. We have uploaded an evening dress icon for our first sub-category which is “Evening Dresses”.
We have replaced the word “night” with the icon of the dress in question but this type of action is your choice and what you think will be clearer to your client is the best option. You can also take a look at this article in which we talk about 20 themes for Prestashop 1.7. Regarding the Prestashop menu, most incorporate several very attractive alternatives and thus it is more striking and personalized.
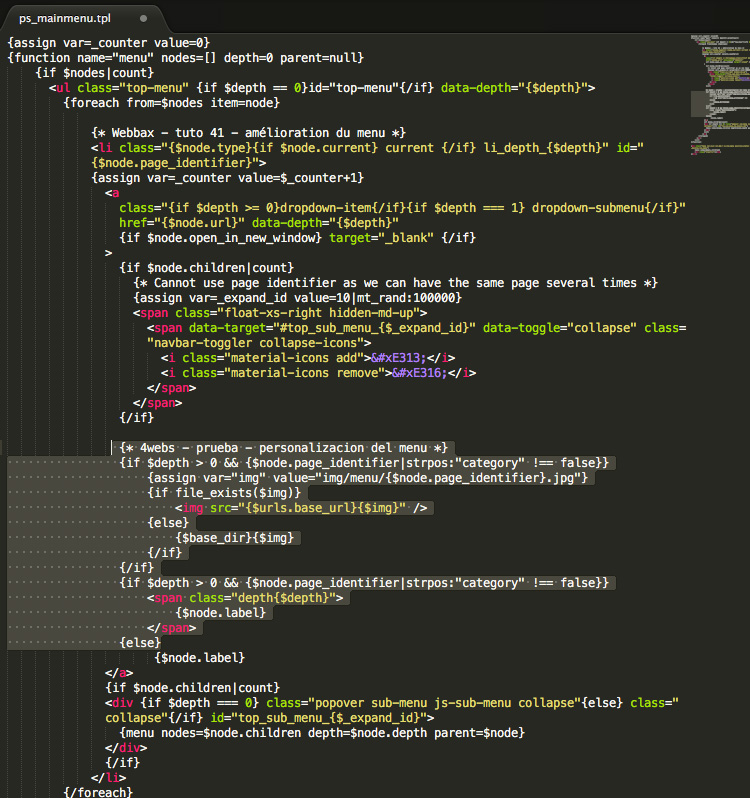
Then, we will modify the file “ps_mainmenu.tpl” so that the images are automatically updated (adding the code that we have highlighted in the following image). We will copy the “menu” folder that we talked about previously with the .jpg images inside it in the “img” folder of our main “prestashop” folder. Remember that we are working locally to teach you this tutorial.
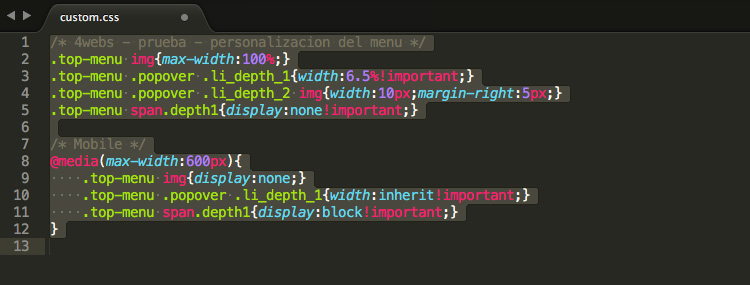
We will integrate the CSS rules in “custom.css” (as we can see in the image below) and we will do different tests to make sure that everything works and is correct and if necessary, we will modify the css rules to adjust the width and margin of the picture. Therefore, you must respect the same format for the images to avoid distortion. And that’s all! Simple, right?
Read More:
How To Remove Prestashop Footer Copyright | Change Footer Copyright