
PrestaShop has the default beautiful option Image Slider on PrestaShop. Slider is the best way to promote the website by creating beautiful slides with the transition effect. PrestaShop has the default image slider module that offers to create beautiful slides show. You can add the beautiful image into the slider with the transition time. Configuring the homepage slider doesn’t require technical or special knowledge and it is very easy for the beginner to set up the image slider on PrestaShop 1.7.
In this article, I will show you how to work with the Image Slider on PrestaShop.
- At first you have to login the PrestaShop site.
- Now go to -> Improve > Module Manager > Search box
Now you have to find out the image slider. If the image slider is installed then you can configure it, if not installed then install it from the Module Catalog.
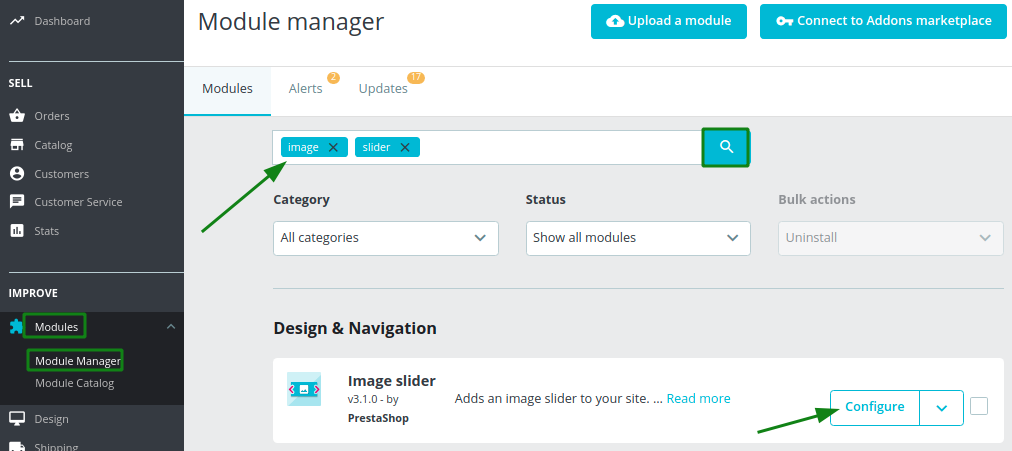
- Click Configure of the image slider.
When you click the configure button, you will see all the basic homepage slides from the image slider on PrestaShop.

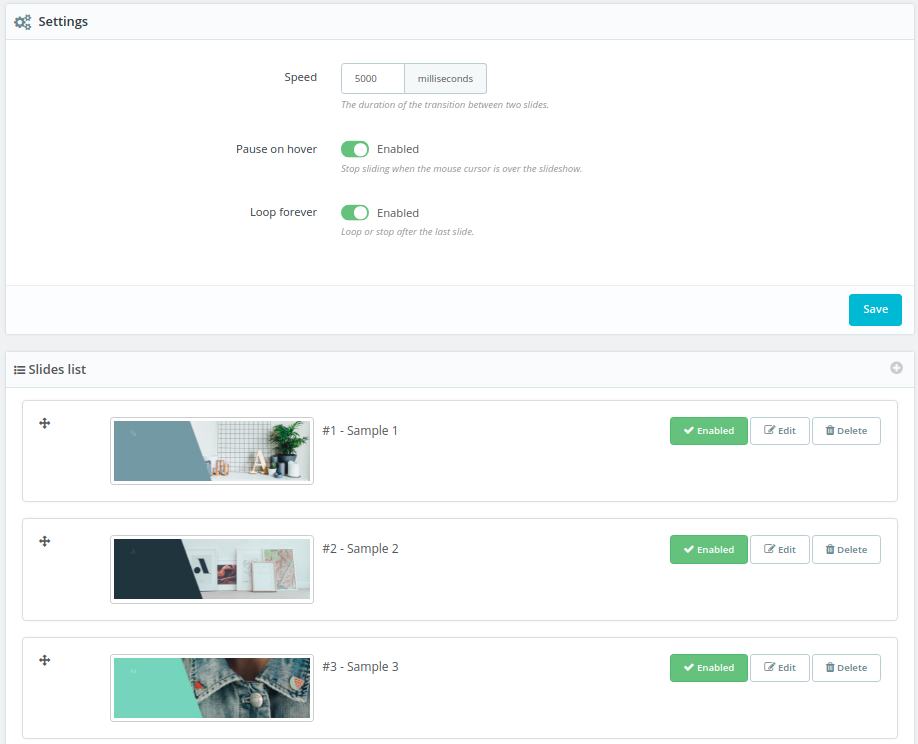
Now we will see some options and we will configure the image slider on PrestaShop.
- Speed: This speed parameters is the duration of the transition between two slides. There unit is miliseconds and 1000 miliseconds is the 1 seconds. There you can increase or decrease the transistion between two slides. From this option, you can increase or decrease the transisiton.
- Pause on hover: There is use a switcher to enable or disable the pause on hover. If you want to stop sliding when the mouse cursor is over the slideshow, then keep pause on hover disable.
- Loop forever: There is use a switcher to enable or disable. Here you can choose whether to loop or stop after the last slide.
Slides list
In the slides list, you will get some options to edit the image slides on PrestaShop.
- + (Add new button): You can add new image slide by clicking + (Add new button).
- Simply you can drag and drop the position of the slides.
- Delete: You can delete the specific slides simply clicking the Delete button.
- Edit: You can edit the existing slide simply clicking the Edit button.
If you click the edit then you will see the new window like this:
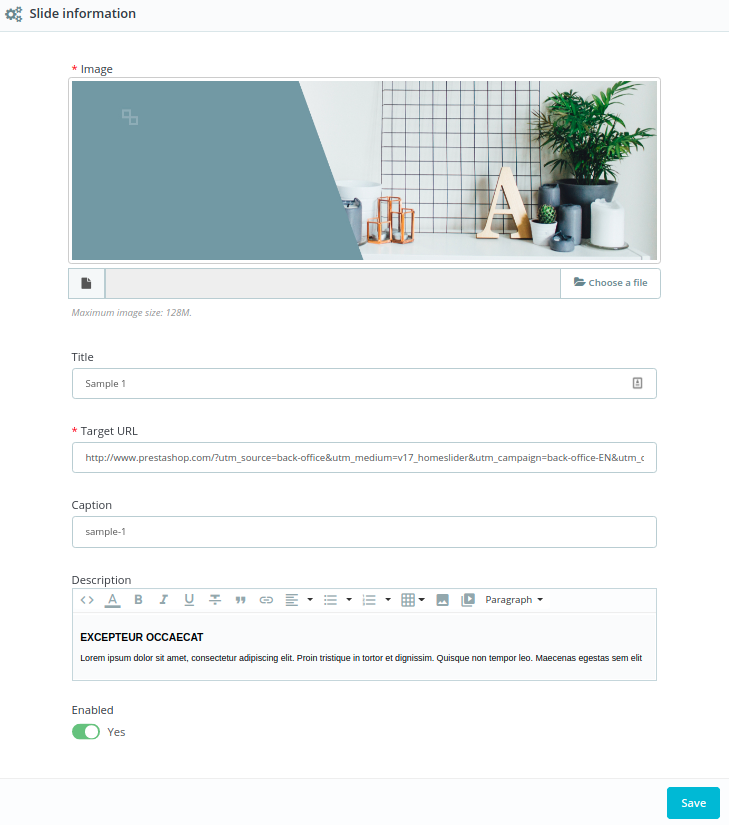
- Image: From the following images option, you can upload the image by clicking Choose a file.
- Title: Here you can add or edit the title. This title will show over the slider.
- Target URL: You can place the url of this field. So when anyone will click over the image then it will redirect to that link.
- Caption: Caption is use as a alt tag. You can set the caption of related to that image or the exact title name.
- Description: This description will show the above the slides image. You can add the text into the description field. You can set the heading, paragraph, underline, or linked text, add image from the description field.
This is all about the Image Slider on PrestaShop 1.7.If you feel any issues to apply the above process, feel free to explore our PrestaShop Development Services.
Read More:
How To Manage PrestaShop Featured Product and Special Products